I have card 14 ready for you to see today!
So, I had to make a graduation card ... and I was coming up blank. I ended up looking through some of my retired stamp sets and came up with an idea. But because I used retired products, I didn’t think it was a good idea to create a tutorial since you wouldn’t be able to purchase the items to recreate it. However, it did give me an idea for a new card that I can give you a tutorial for! It’s a shaker window card! I forgot how much fun these were to make, and how cool they look!
Here’s the supplies I used for this card (a complete list will be at the end of this post …
I started with cutting out my pieces with the Big Shot and Layering Squares Dies. Using the Mango Melody card front, I positioned the square die where I wanted it and ran it through the Big Shot. Then, I took a scrap of Basic Black cardstock and positioned the square and scalloped square and ran them through. Using both dies at the same time creates the frame …
I positioned the piece of Whisper White cardstock on the back of the Mango Melody, centering it. Then I carefully flipped it over (I didn't use any adhesives yet). I used a pencil to mark the corners of the cut out square, then removed the Mango Melody card front …
I decided to make a 'sunrise' by punching out a piece of post-it note for a mask. I used the 1" Circle punch, and punched on the sticky part of the post-it. Then I placed it on the Whisper White, positioning it within the marked square …
Next, I used the sponge daubers to rub ink within the marked square, gently going over the circle mask. I started with Daffodil Delight, then Mango Melody, Melon Mambo and finally Balmy Blue. Make sure to overlap the colors to blend them a little and cover the entire inside of the square …
I carefully lifted the mask, and gently rubbed Daffodil Delight over the circle …
Memento Tuxedo Black in was used to stamp the silhouette, careful to make sure its inside of the square …
I used liquid glue to attach the frame to the card front. Then Memento Tuxedo Black ink to stamp the sentiment on the card front …
And now it's time for the Shaker part!! If you don't have the supplies, or don't want to make it a shaker card, you can easily put it together now and have a really cute card!
I cut a piece of window sheet 3.5"x3.5". To attach, I found it easiest to add the adhesive to the back of the card front, all around the square then add the window sheet …
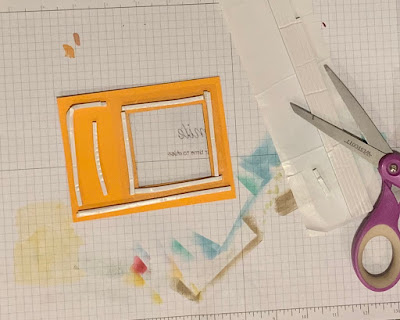
To give it space and dimension, you need to add foam adhesive strips. First, add it completely around the window (if it's not completely around the window, the sequins will fall out). Then add it around the edges to add support, but don't go too close to the edge because the Whisper White cardstock that we stamped is a little smaller …
Add some sequins inside the window. All I could find were my retired metallic ones, but there are Iridescent ones in the current catalog that would look awesome! Peel off the backing of the foam strips and attach the stamped cardstock. Double check to make sure you have it facing the right direction! Once adhered, give it a shake! They're so fun!!
Apply adhesive to the back, and attach it to the Whisper White card base ...
That's it! Make sure you give it a few shakes before you give your card to someone! They're so fun!!
And here's the original one I made for a graduation, using retired products. There are endless possibilities for using this technique. I definitely have to keep it in mind for more cards in the future …
Here's the list of supplies that I used for todays card. You can purchase any of them on my Stampin' Up! shopping website by clicking right HERE
Thank you for stopping by!
xoxo
Dawn


No comments:
Post a Comment