It’s Day 4 …
Woohooo! I'm on a roll with this challenge!!
Today's card I'm using one of my favorite stamp sets - Colorful Seasons. If you're looking for a versatile stamp set, I would consider getting this one. There are so many cards you can make with it! I plan on using this set several times during this challenge.
These are the supplies I'm using (there will be a detailed list, including measurements, at the bottom of this page). The colors I'm using are Crumb Cake, Balmy Blue, Coastal Cabana, Calypso Coral and Memento Black.
I started off with the small piece of Whisper White cardstock. I'm using finger daubers to apply the ink. These daubers fit right on the tip of your finger, making it easy to control the ink. I tapped the dauber in the Crumb Cake Ink, and gently swiped across the bottom of the cardstock. You want to softly rub, adding light coverage. You can always go over it several times to make it darker ...
Using the same technique, add the Coastal Cabana then Balmy Blue. Use a new dauber for each color, and remember to apply softly until you get the desired darkness ...
Next, I stamped the chair using Crumb Cake ink. Make sure the legs of the chair are in the 'sand' …
I took a scrap piece of Whisper White cardstock and stamped the seat of the chair using Calypso Coral ink. Then using my scissors, I carefully cut it out …
I set those 2 pieces aside and grabbed the Calypso Coral card layer for the front. Using Memento Black ink, I stamped the sentiment on the bottom center …
Now it's time to put the card together! I applied adhesive to the back of the piece I just stamped, and added it to the card base. Then I attached the small piece to black cardstock and attached it to the card front. I added Stampin' Dimensionals to the back of the chair seat and added it to the chair frame ...
And the card was complete!! …
Here's another example. Instead of black, I changed it up a bit by using VersaMark Ink, White Embossing powder and the Heat Tool …
That's it for Card #4!! I hope you enjoyed this tutorial and feel comfortable making one yourself. As always, if you have ANY questions please let me know. Comment below, leave a message or email me.
I hope you're following me on my Facebook page too! I post a lot of information, sales, specials and events over there that you don't want to miss out on!
Here's a list of the supplies that I used for this card. You can purchase every item on my shopping website Click To Shop …
Thanks for stopping by!! And have a SAFE and FUN 4th of July!!
xoxo
Dawn
Thursday, July 4, 2019
Wednesday, July 3, 2019
#30DayCardChallenge - Day 3
Day #3!!!
Today I'm creating a card with one of April 2019 Paper Pumpkin stamps. (If you're not familiar with Paper Pumpkin, click HERE to learn more.) This stamp is what Stampin' Up! calls a DistINKtive stamp. Distinktive stamps are photo-realistic images and have a special texture that gives added depth and dimension in a single step. To learn more about Stampin' Up! stamp types, click here … Stamp Types
There's a stamp set in the new catalog called 'Healing Hugs' that would also be perfect for this project. I don't have that one yet, but it is on my Wish List! I'm also using an easy technique called 'Masking' that I'll explain below.
To get started, I'm using Flirty Flamingo Cardstock for the base, Highland Heather Cardstock for the layer, and Whisper White Cardstock for the card front. I'm also using Flirty Flamingo Ink, Highland Heather Ink, Mint Macaron Ink, and So Saffron Ink. These are some of my favorite colors!
The first thing I did was create the mask ... I stamped the image on a Post-It Note, making sure to get most of the image on the sticky part, then cut it out …
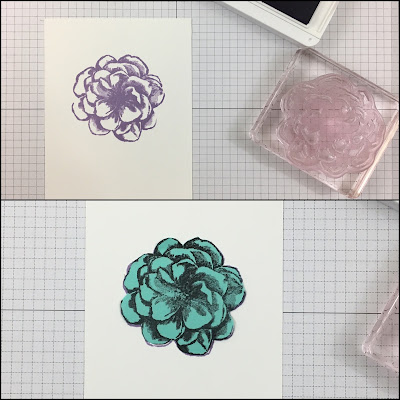
I chose Highland Heather Ink as my focal color and stamped the image. I then covered the image with the cut out (the sticky part holds it in place).
I stamped over the mask with the other colors, taking care not to overlap …
When I lifted the post-it note, the image is clear and looks like it's in front of the others …
You can also create this card without masking, and the flower colors would overlap. Notice the difference? …
I used the mask over the lower flowers to create more depth without overlapping the colors. You can create multiple masks to make it easier …
Attach the card front to the Highland Heather layer with Snail Adhesive, then attach to the base …
I left the front as is, so I can write a note on the inside …
But you can easily add a sentiment by stamping on a piece of scrap cardstock and cutting it out, then attaching it to another coordinating scrap of cardstock …
That's it for Card #3!! Are you joining me in this challenge? I sure would love to see your creations! Feel free to post it with a comment below, or you can post it on my Facebook page.
If you would like to recreate this card, here is a list of the supplies that you can purchase in my online store. Click HERE to shop.
SUPPLIES USED:
Item Number
148223 Stamp Set, Healing Hugs (not used)
141416 Cardstock, Flirty Flamingo; cut 8 1/2"x5 1/2"
146986 Cardstock, Highland Heather; cut 5 1/4"x4"
100730 Cardstock, Whisper White; cut 5"x3 3/4"
147103 Ink, Highland Heather
147106 Ink, Mint Macaron
147052 Ink, Flirty Flamingo
147109 Ink, So Saffron
104332 Snail Adhesive
Thank you so much for stopping by!! As always if you have any questions, please don't hesitate to contact me. Leave a comment, send a message of shoot me an email!
xoxo
Dawn
Tuesday, July 2, 2019
#30DayCardChallenge - Day 2
Hello, Hello!!
I have card #2 ready for you!! This one, I'm using the Daisy Delight stamp set and coordinating Daisy punch …
For this card, I'm using Granny Apple Green cardstock for the base, Daffodil Delight Cardstock for the layer, and Whisper White Cardstock for the daisies.
I'll also be using Granny Apple Green Ink, Daffodil Delight Ink, Versamark Ink and White Embossing Powder …
Using the Versamark Ink, stamp 4 daisies on the Whisper White Cardstock. Be careful to stamp toward the edge to make it easier to position the punch ...
Working quickly so the Versamark doesn't dry, pour the White Embossing Powder over the stamped images …
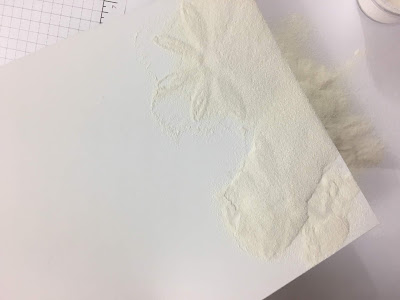
Tap off excess Embossing Powder, then use the Heat Tool to apply heat and melt the embossing powder. Be careful not to get too close, or heat for too long. You want to hold the Heat Tool a couple of inches above the cardstock and move it when you see the image turn shiny …
Let sit for a few moments to cool. I was originally going to use the center flower stamp and Daffodil Delight Ink, but changed my mind and just used the Daffodil Delight Stampin' Blend Marker to color in the centers of 2 of the Daisies …
Flip the Daisy Punch upside down and slide the stamped image into it. Once aligned, punch out. Repeat for all 4 Daisies …
I used Tombow multi purpose liquid glue to attach 2 daisies together colored ones on top). The liquid glue makes it easier to move around to position them better …
The sentiment 'Thank You' is one stamp. However, I cut it apart so I can position the words above each other instead of one line. I used Granny Apple Green Ink and stamped the sentiment on the piece of scrap Whisper White Cardstock …
I used the Layering Ovals die set to cut out the sentiment and a scalloped oval outline in Granny Apple Green Cardstock …
I attached the sentiment to the outline with snail adhesive, then added 2 Dimensionals to the back and set it aside …
I arranged the daisies on the Daffodil Delight card front, then used Granny Apple Green Ink to stamp the stems and attached them with dimensionals …
Use Snail Adhesive to attach to the card base …
Attach the sentiment to the front …
Close up of the embossing …
That's it for card #2!! If you would like to make this card yourself, here's a list of the supplies I used (you can order them in my online store at www.dawnbowman.stampinup.net)
143669 Daisy Delight Photopolymer Stamp Set
143713 Daisy Punch
146990 Granny Apple Green Cardstock, cut 8 1/2"x5 1/2", scrap
119683 Daffodil Delight Cardstock, cut 4"x5 1/4"
100730 Whisper White Cardstock, scrap piece
147095 Granny Apple Green Classic Ink Pad
144585 Daffodil Delight Stampin' Blends Marker
102283 VersaMark Ink Pad
109132 Embossing Powder, White
129053 Heat Tool
104332 Snail Adhesive
110755 MultiPurpose Liquid Glue
104430 Stampin' Dimensionals
Thank you so much for stopping by!! If you have any questions, please don't hesitate to comment, send me a message or email me.
xoxo
Dawn
I have card #2 ready for you!! This one, I'm using the Daisy Delight stamp set and coordinating Daisy punch …
For this card, I'm using Granny Apple Green cardstock for the base, Daffodil Delight Cardstock for the layer, and Whisper White Cardstock for the daisies.
Using the Versamark Ink, stamp 4 daisies on the Whisper White Cardstock. Be careful to stamp toward the edge to make it easier to position the punch ...
Working quickly so the Versamark doesn't dry, pour the White Embossing Powder over the stamped images …
Tap off excess Embossing Powder, then use the Heat Tool to apply heat and melt the embossing powder. Be careful not to get too close, or heat for too long. You want to hold the Heat Tool a couple of inches above the cardstock and move it when you see the image turn shiny …
Let sit for a few moments to cool. I was originally going to use the center flower stamp and Daffodil Delight Ink, but changed my mind and just used the Daffodil Delight Stampin' Blend Marker to color in the centers of 2 of the Daisies …
I used Tombow multi purpose liquid glue to attach 2 daisies together colored ones on top). The liquid glue makes it easier to move around to position them better …
I used the Layering Ovals die set to cut out the sentiment and a scalloped oval outline in Granny Apple Green Cardstock …
I attached the sentiment to the outline with snail adhesive, then added 2 Dimensionals to the back and set it aside …
I arranged the daisies on the Daffodil Delight card front, then used Granny Apple Green Ink to stamp the stems and attached them with dimensionals …
Attach the sentiment to the front …
143669 Daisy Delight Photopolymer Stamp Set
143713 Daisy Punch
146990 Granny Apple Green Cardstock, cut 8 1/2"x5 1/2", scrap
119683 Daffodil Delight Cardstock, cut 4"x5 1/4"
100730 Whisper White Cardstock, scrap piece
147095 Granny Apple Green Classic Ink Pad
144585 Daffodil Delight Stampin' Blends Marker
102283 VersaMark Ink Pad
109132 Embossing Powder, White
129053 Heat Tool
104332 Snail Adhesive
110755 MultiPurpose Liquid Glue
104430 Stampin' Dimensionals
Thank you so much for stopping by!! If you have any questions, please don't hesitate to comment, send me a message or email me.
xoxo
Dawn
Don't forget that BONUS DAYS are here!!
Stampin' Up! has a promotion going on … for the month of July, for every $50 spent (before tax & shipping) you will receive a $5 coupon to be used in August. You can accumulate as many coupons as you'd like, and use as many as you have on any order! How sweet is that?!
Monday, July 1, 2019
#30DayCardChallenge - Day 1
I am participating in a 30 Day Card Challenge! I'm so excited to challenge myself with this. It's been quite awhile since I've created cards consistently!
Here's my first card for the challenge.
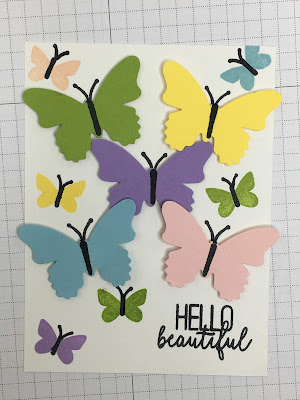
I'm using the stamp set Butterfly Gala, with the coordinating punch.
I'm starting with Highland Heather (Purple) Cardstock, cut at 8 1/2x5 1/2; Basic Black Cardstock, Cut at 5 1/4x4; Whisper White Cardstock, cut at 5x3 3/4; Scraps of assorted cardstock ...
The first thing I did was punch out butterflies with the butterfly punch. I'm only using the larger butterfly for this card, so I'll save the small ones for another project …
Using Tuxedo Black Memento Ink, I stamped the butterfly body on each of the butterflies and the sentiment on the Whisper White Cardstock layer …
I arranged the butterflies where I wanted them, then using the Tuxedo Black Memento Ink I stamped the antennae in position.
Using foam dimensionals, I attached each of the butterflies …
Now, you can attach it to the Basic Black layer and attach that to the card base and be done …
But, if you have the coordinating inks and would like to add more, you can stamp the small butterflies randomly …
When I was stamping the small butterfly bodies and antennae, I realized I made a smudge under the blue butterfly! So instead of just starting over, I stamped another butterfly so it's not so noticeable …
To complete the card, attach the card front to the Basic Black layer …
Then, attach that to the card base (I know it's a little crooked, that's okay with me) …
148582 Butterfly Gala Photopolymer Stamp Set
148523 Butterfly Duet Punch
146986 Highland Heather Cardstock, cut 8 1/2"x5 1/2"
121045 Basic Black Cardstock, cut 4"x5 1/4"
100730 Whisper White Cardstock, cut 5"x3 3/4"
147103 Highland Heather Classic Ink Pad
147105 Balmy Blue Classic Ink Pad
147095 Granny Apple Green Classic Ink Pad
147141 Pineapple Punch Classic Ink Pad
147108 Petal Pink Classic Ink Pad
132708 Tuxedo Black Memento Ink Pad
As always, if you have any questions please don't hesitate to leave a comment, or send a message or email.
Thanks for stopping by!!
xoxo
Dawn
Oh! One more thing! BONUS DAYS are here!!
Stampin' Up! has a promotion going on … for the month of July, for every $50 spent (before tax & shipping) you will receive a $5 coupon to be used in August. You can accumulate as many coupons as you'd like, and use as many as you have on any order! How sweet is that?!
Subscribe to:
Posts (Atom)


