Hello, hello!
I recently painted and redecorated my kitchen. So, I thought I’d share some of the DIY’s I did.
I have a very small, galley style kitchen, with a small dining area. Quite a few years ago, I painted and decorated in a wine theme. I’ve been wanting to redecorate for quite awhile, but really loved the wine theme and couldn’t decide on something better. Sooo, I decided to stick with the wine theme, but just update it lol. I knew I wanted to use wine quotes/phrases and wine corks, plus some of the decor I already had.
My walls were a dark tannish color. I had used my Cricut machine to cut out wines on white vinyl to create a border. Here’s what my old kitchen looked like ...
I decided to stick with the tan color, but went a lighter shade. And for the wall with the table, I decided to paint red. I know, I was so scared to use red! But the hubs and I always say ‘It’s just paint. We can always paint over it if we don’t like it’. And here’s my kitchen now ...
I am sooo happy with the way it turned out! Now for the DIY’s ...
I knew that I wanted to use wine quotes/phrases, but I wasn't sure how I wanted to include them. I came across a tutorial for some framed box signs, so I sent the hubs to our local Home Depot for wood and we created around 16 or so boxes! I used the same red paint from the wall and painted them all. Then using my Cricut and white vinyl, I added all of the phrases and used them as a border around the whole kitchen ...
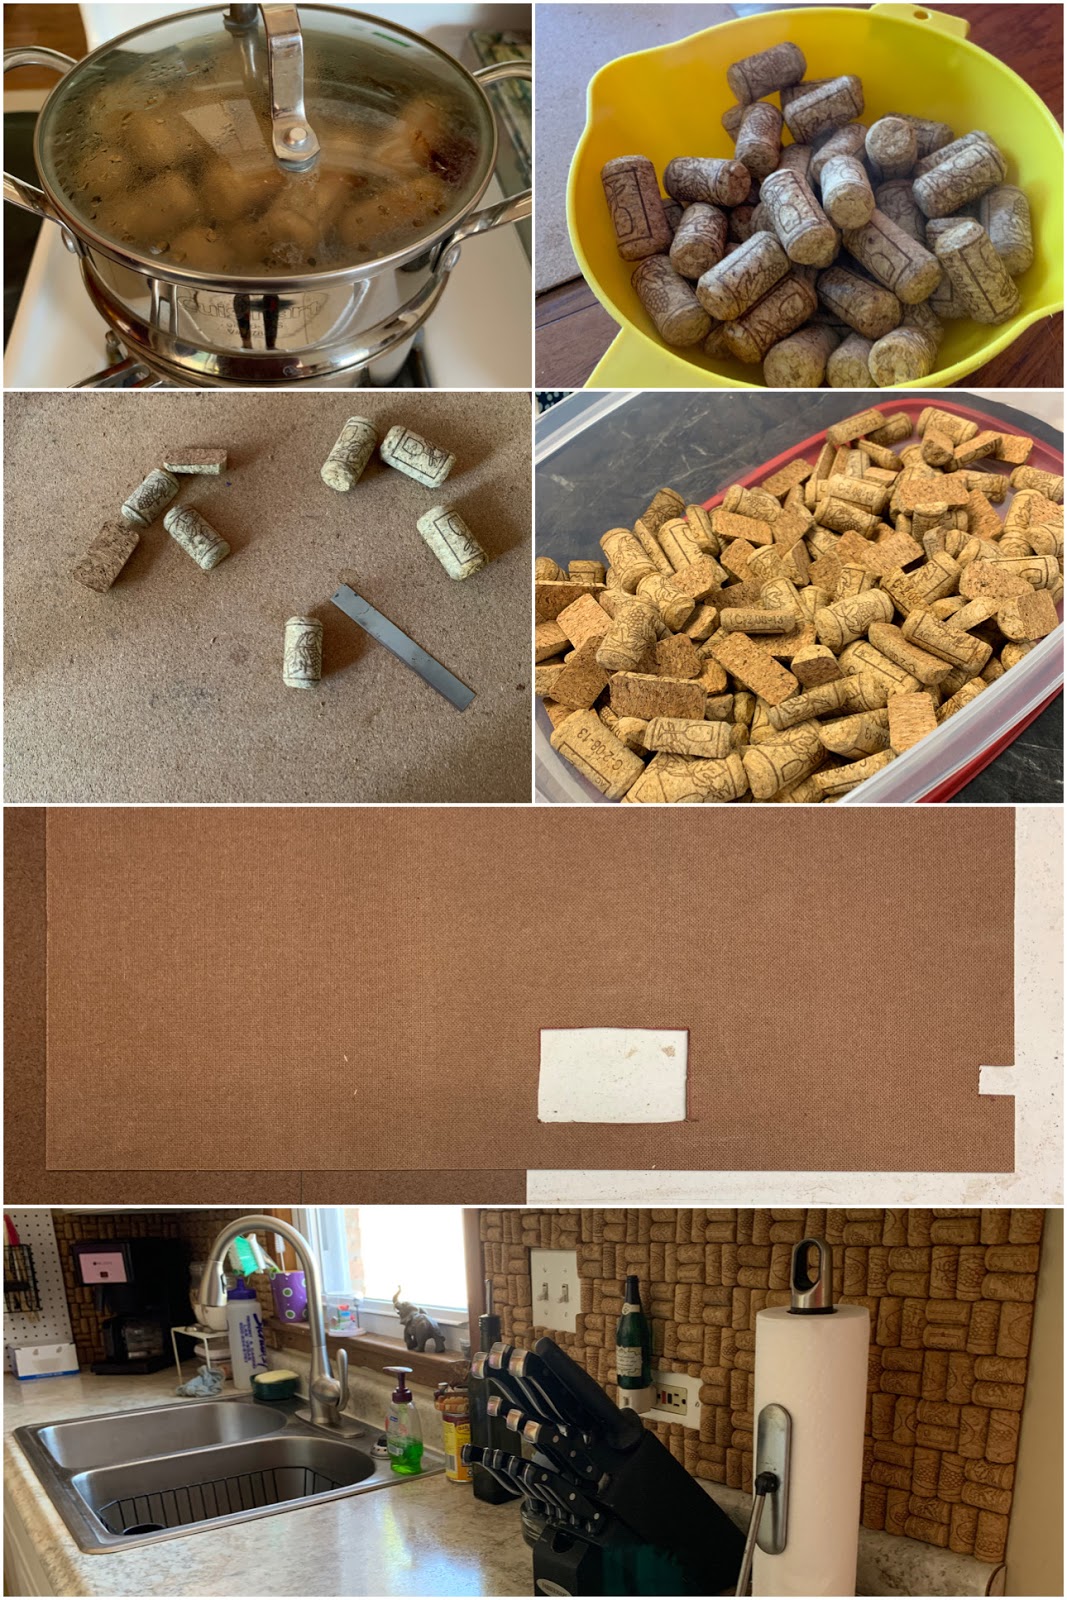
I had a ton of wine corks left over from a previous project that I knew I wanted to incorporate into the new kitchen. After a quick Google search, I knew that I wanted to create a back splash with them! I really didn't want to glue them directly to the wall, so the hubs went back to Home Depot for a sheet of paneling. We measured and cut the area for the back splash, then hot glued the corks to them, and used a few nails to attach them to the wall. It'll make it so much easier when I want to redecorate in the future!
After more research (& a lot of trial and error!) I found the easiest way to cut all of the wine corks in half! I put them in a steamer basket (in batches) and let them steam over boiling water for about 15-20 minutes. Then I took a long razor blade and cut them lengthwise. They cut so easy!! Just make sure you have a sharp razor. I used hot glue to attach them to the paneling, then attached it to the wall.
For the last DIY, I had an old bulletin/dry erase board that I had hanging on my pantry door. It was so convenient to have, but after years of use the dry erase wasn't working any more. I painted the trim with the same red wall paint. Then painted over the dry erase board with chalkboard paint! And the cork on the bulletin was pretty worn, so using the same cork method I covered the bulletin board.
So that's my new kitchen! I hope you enjoyed my little tour. If you have any questions please don't hesitate to contact me.
Thanks for stopping by!
xoxo
Dawn


No comments:
Post a Comment