Tuesday, November 23, 2021

30 Days of Thanks - Day 23

Card number 23 …

When using the Nothing’s Better Than stamp set, I find myself using the cocktails quite a bit lol. This time I decided to use the cookies!

I used the framelits from Hippo Happiness and stamped the sentiments. Then I stamped and diecut a bunch of the cookies and attached them to the back. Once I got them all on, I attached it to Early Espresso, then onto Balmy Blue card base…

Thank you for stopping by! 

xoxo
Dawn


Monday, November 22, 2021

30 Days of Thanks - Day 22

 Card 22 …

I just have to say, this stamp set with coordinating dies is so very special to me! When you're a Stampin' Up! demonstrator and reach $1 million in sales, aside from many other rewards and perks, you get to help design a stamp set! Isn't that awesome?! Well, this stamp set was designed by my team leader Robyn Cardon. She is just so amazing and inspiring. I love this set so much! It is so versatile with all of the shaped dies. I find myself using the framelits quite often.

For this card, I decided to cut out the front layer of DSP with the framed die. Then I used 2 dies that fit into each other to cut out a frame. You just line them up on your cardstock and run it though the Stampin' Cut & Emboss machine together. You end up with an open frame to put on the cut piece ...


I stamped the image and sentiment on a piece of Basic White cardstock ...

I centered it in the opening and attached it to the back of the cut out card front. Then I adhered it to the card base. Here are the products that I used on this card. Hippo Happiness Stamp Set & Dies, Highland Heather cardstock and ink, Hand Penned Designer Series Paper ...

Thanks for stopping by today! If you have any questions, please leave a comment or contact me …

xoxo
Dawn


Sunday, November 21, 2021

30 Days of Thanks - Day 21

Oh my gosh, I am just loving this rainbow glimmer paper! I’ve been using just small bits here and there, trying to conserve it lol. I sure hope Stampin’ Up! keeps this forever!

So, here’s the card I made for today …


I used Memento Tuxedo Black ink to stamp the image from the stamp set Nothing’s Better Than on the rainbow glimmer paper, then cut them out with the matching die. I wanted the glittery glimmer paper to really stand out, so I attached them to Basic Black cardstock. Then layered on Bermuda Bay and Blackberry Bliss. 

I used VersaMark ink and white embossing powder for the sentiment, which is from the retired set Sip Sip Hooray.

I hope you love this one as much as I do! If you have any questions, please don’t hesitate to contact me …

xoxo
Dawn


Saturday, November 20, 2021

30 Days of Thanks - Day 20

Whoa only 10 more days of this challenge! I am having so much fun making all of these cards and sharing them! I hope you’ve been following along.

Here’s card number 20 …

This was a pretty simple card! I used the Picture Perfect dies on the front of the Pale Papaya card base to make a cute little peek-a-boo card. I cut the Designer Series Paper to fit inside, but attached it in reverse to it's sort of a tri-fold card. For the stamped images, I used the Picture This dies again on Basic White. I stamped the images, then adhered them inside the cut card front onto the DSP ...

I love the way this one turned out! What do you think?

Thanks for stopping by today! If you have questions, please feel free to comment or contact me.


xoxo
Dawn


Friday, November 19, 2021

30 Days of Thanks - Day 19

 Happy Fridayyyy!!! Here's Card 19 …


This card was for another team challenge. Well, actually 2 challenges lol. Our team leader gave us a sketch challenge and a color challenge and I decided to use both in 1 card. The colors I used are Crushed Curry, Early Espresso, Old Olive and Rich Razzelberry. I stamped each image with the same ink as the cardstock ... Crushed Curry ink on Crushed Curry cardstock, etc. Then I cut each image with the coordinating dies and put it all together ...


Thanks for stopping by today! If you'd like to recreate this card, you can find all of these supplies on my Stampin' Up! shopping website.

xoxo
Dawn

Having trouble remembering my website? Looking for my shopping links? Need more info on any of my companies? Just remember my name (in reverse lol)!!! Try it out right HERE


Thursday, November 18, 2021

30 Days of Thanks - Day 18

 Card number 18 … I just love these colors! They’re so bright and cherry!


This card came about because of another team challenge. I just love these team challenges that my team leader comes up with! They are so inspiring. This is the sketch challenge she shared with us ...
I had a scrap of rainbow glimmer paper and decided to use it. I cut 3/4" strip and chose coordinating colors to go with it ... Magenta Madness and Mango Melody. I decided to add black as the outline and cut the pieces with the punch ...

After deciding on the colors to use, I grabbed my packet of Brights DSP and chose the patterned Mango Melody. For the card base, I chose Magenta Madness, and used Basic Black for the layer ...

And that's it for card number 18! I hope that you're enjoying the cards that I'm sharing each day. Feel free to leave a comment or contact me with questions.
Thanks for stopping by!

xoxo
Dawn


Wednesday, November 17, 2021

30 Days of Thanks - Day 17

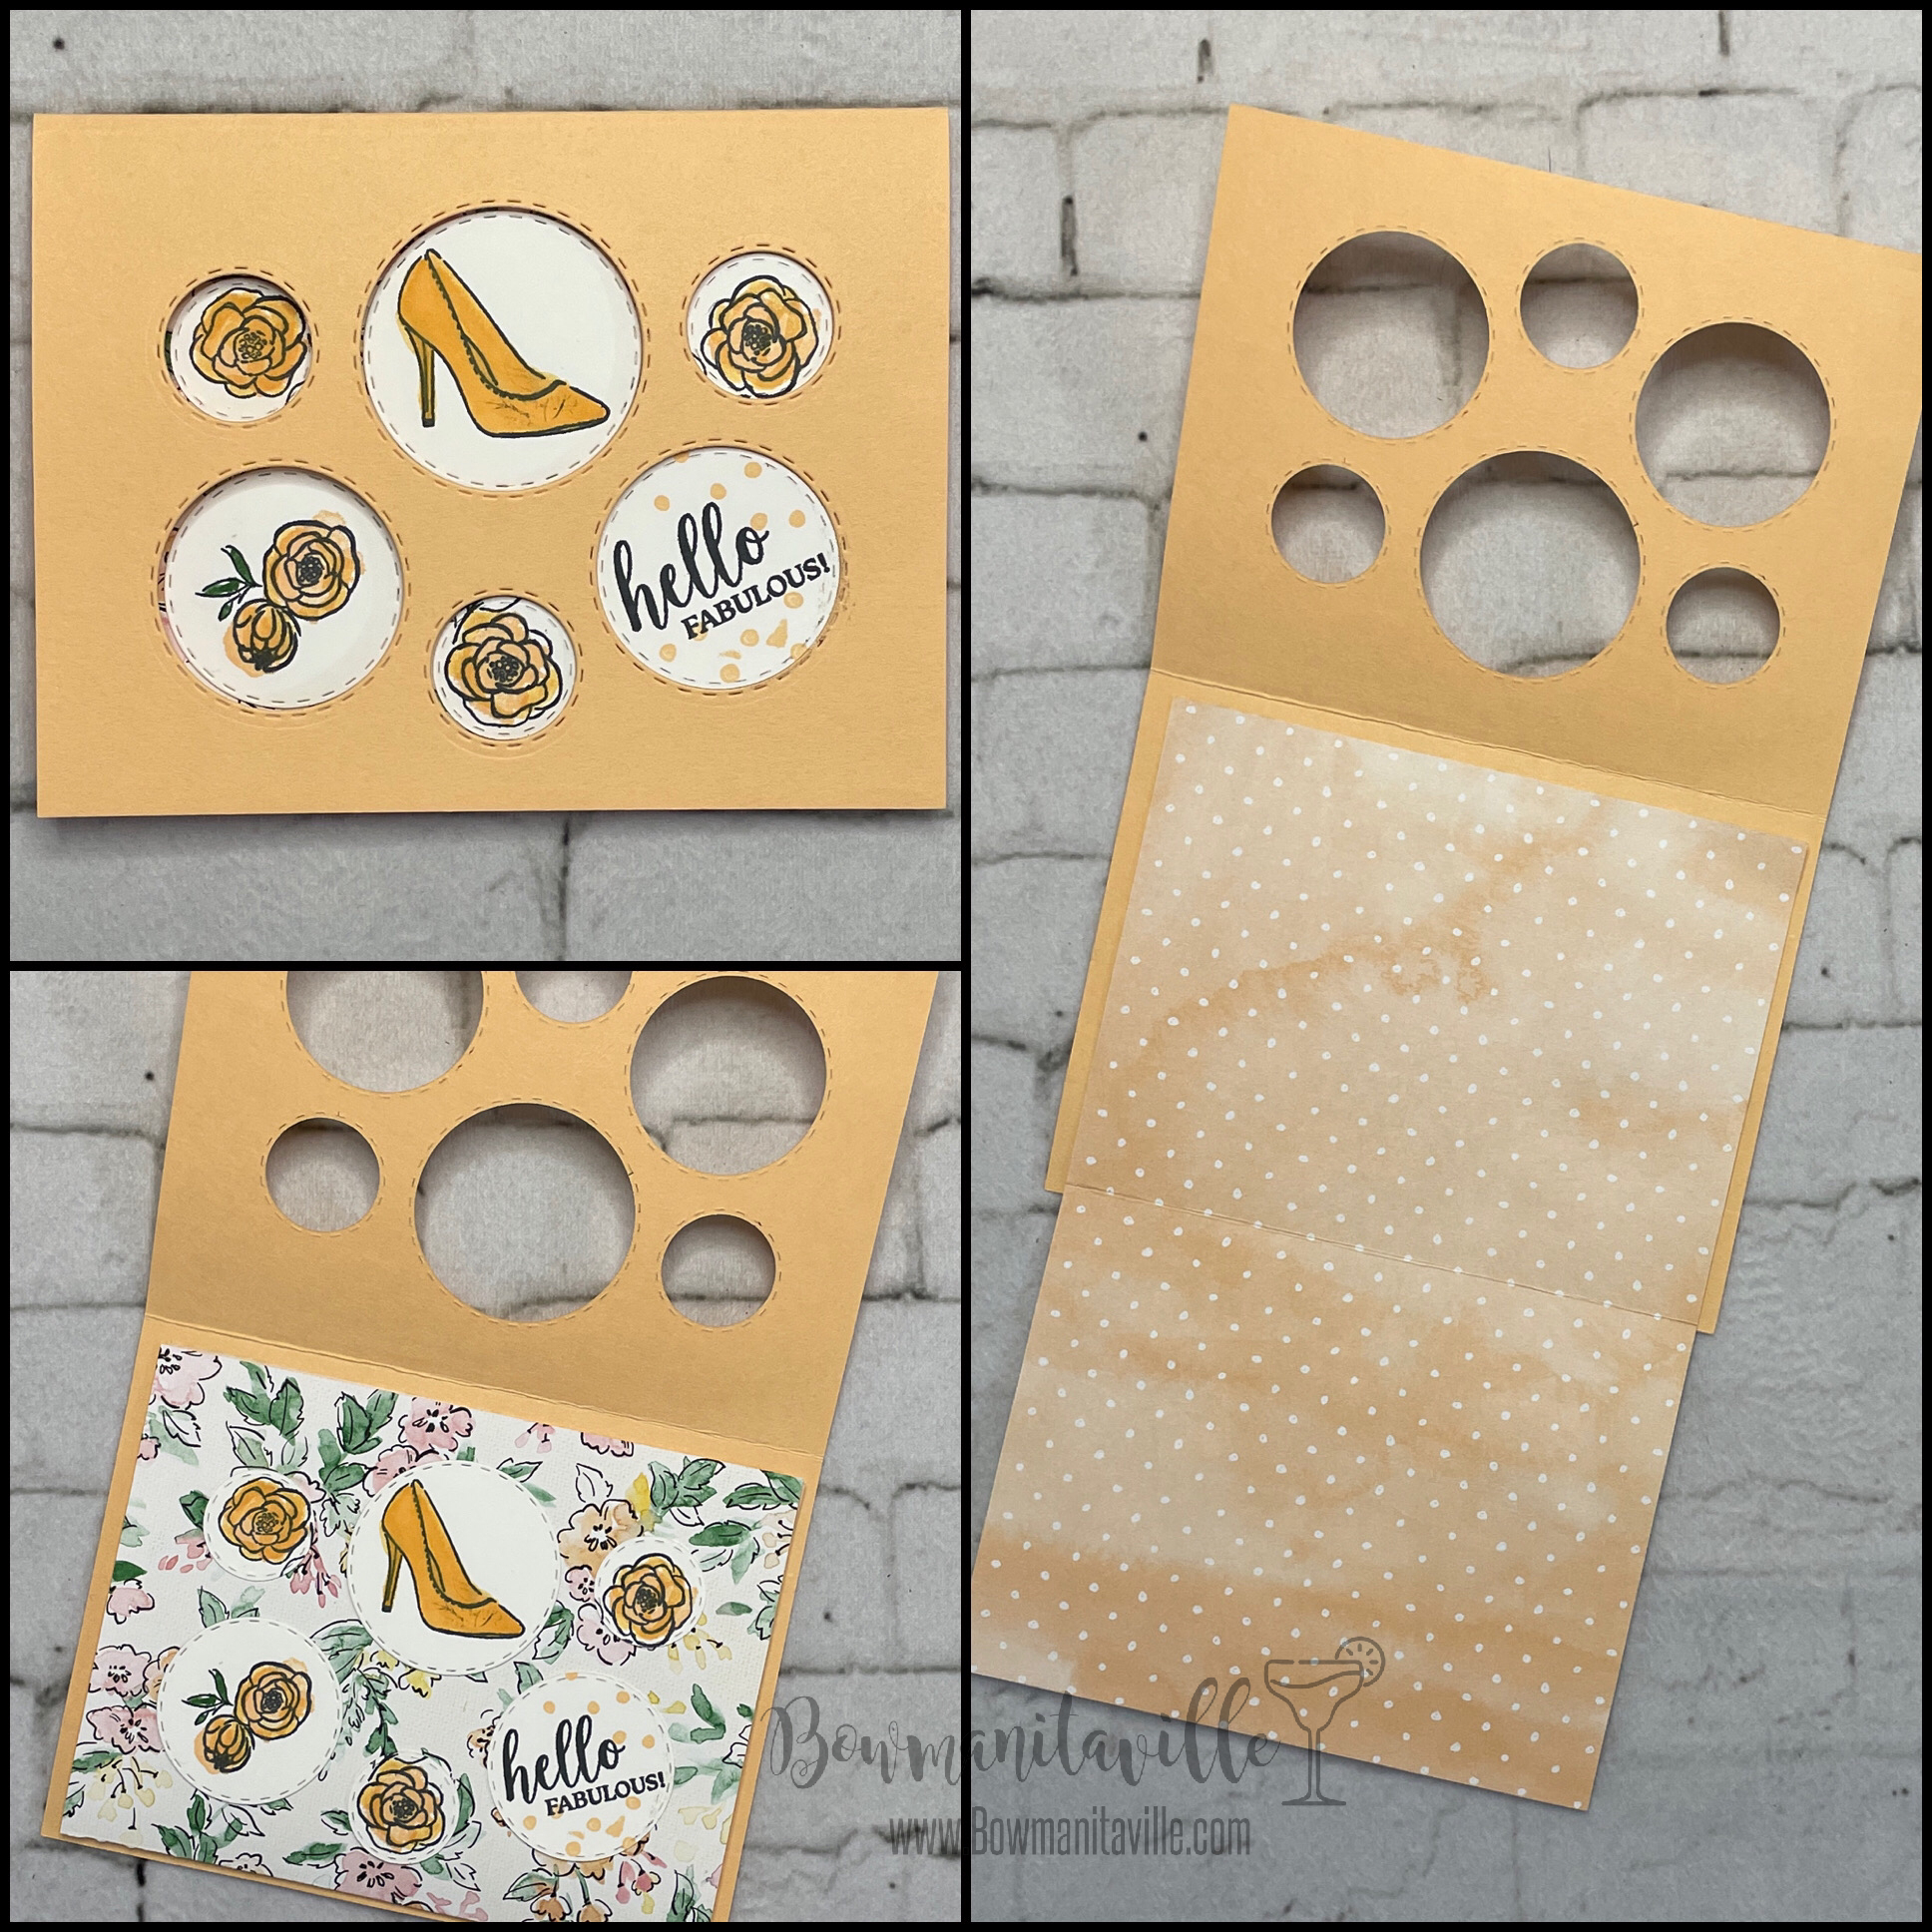
Here's card number 17 for this challenge ...


I've made a card like this in the past, and I absolutely love this design! I'll post a link to a step by step post I made at the end of this post. For this card, I was inspired by my teams weekly color challenge. I started by cutting circles with the Layering Circles dies ...


I glued them on top of each other, then cut them in half. You use half of each circle, so you can make 2 cards ...

I chose the coordinating Regals DSP as a background, and attached a piece of foam adhesive across the center ...

I aligned each of the half circles above and below the foam adhesive and attached them, lining up the circles ...

A stamped the sentiments with Blackberry Bliss ink onto the small circle die, and a strip of Basic White cardstock. I adhered them onto the foam adhesive, adding a couple of dimensionals to the back of the circle for added support ...

I attached it to a Blackberry Bliss card base and it was complete! Here are all of the supplies that I used for this card ...

If you'd like to see the step by step instructions I made, just click HERE

As always, if you have any questions, please feel free to leave a comment or contact me. Thanks for stopping by!


xoxo
Dawn