Monday, July 8, 2019

#30DayCardChallenge - Day 8

Happy Monday, Crafters!
I have a card for the Card Challenge ready for you to see! Today, I'm using the stamp set "This Little Piggy'. I think it's a really cute set! I'm also using 'Buffalo Check' background stamp. I love using this one for quick and easy backgrounds. The colors I'm using today are Flirty Flamingo and Early Espresso. Everything I use, plus measurements, will be listed at the end of this post. Here's what I'm using today …
I'm using my Stamparatus for most of the stamping on this card. Stampin' Up! created the Stamparatus for stamp positioning. The base has a clear coating on it, and there are 2 hinge plates. It also comes with a foam mat for Photopolymer stamps. Since the sets I'm using are clear mount, I wont need the foam mat for this card. I created a guide out of cardstock so I can position my card piece away from the edges. This comes in handy especially when using the large background stamps.
I'm using Flirty Flamingo cardstock as my card front. So I placed that in my guide. I took the large background stamp and set it over my cardstock to position it where I wanted. I used the grid on the base to help line it up straight. Then I pulled the hinged plate over it and pressed down to pick it up ...
When you pull back the hinged plate, The stamp is stuck to it and you can ink it up.
Pull the hinged plate over your cardstock and apply gentle pressure. Pull it back up and your cardstock is inked! The Stamparatus is such a cool tool! If you don't get an even ink coverage, simply ink it up again and press it on the cardstock. The paper and stamp hasn't moved so you'll get perfect placement every time! This is also perfect if you were doing several of the same card - simply change out the cardstock and repeat. Cleaning up is easy with baby wipes ... 
I'm using Early Espresso cardstock as the card base. If you want to apply the card front now, you can. Otherwise, just line it up where it will go ...
 I brought it over to my Big Shot and placed it on the platform. I'm using the large scalloped circle Die and the Circle Die that fits right inside of it. First, I placed the Circle Die on the card front, positioning it in the center, more towards the top. After I ran that through the Big Shot, I took a piece of Early Espresso Cardstock and arranged the Scalloped Circle with the Circle Die inside of it and ran it through ...
You can discard the cut circles, or use them for another project …
 If you haven't attached the card front to the card base, add adhesive and attach it now ...
 I use liquid glue to add the circle frame. It gives it a little wiggle room so you can line them up easier …
Take the piece of Whisper White cardstock and center it inside. Don't add adhesive yet, we'll be stamping the pig on it first ...
Close the card, and place the pig stamp in position. Gently pop it through the circle while lifting the card front …
 Carefully holding the stamp in place, set the cardstock on the Stamparatus. Make any adjustments needed to straighten out the stamp slightly, then pull the hinged plate over the adhere the stamp ...
 Ink the stamp with Early Espresso Ink, and gently press the hinged plate onto the cardstock ...
Using the Early Espresso Ink, stamp the sentiment …
 I used Light Flirty Flamingo Stampin' Blends Marker to color in the pig, then the Dark Flirty Flamingo Stampin' Blends Marker to add a little highlight. When using the Blends Markers, use gentle pressure and slowly work towards the outline. Don't get too close, as they bleed a little ...
Apply adhesive to the back and attach to the inside of the card …
 Here's the completed card …
Thank you so much for stopping by! I hope you enjoyed this card. As always, of you have any questions please don't hesitate to contact me.
xoxo
Dawn

Here's a list of all the supplies that I used. You can purchase them all on my shopping website right here … DawnBowman.StampinUp.net


Sunday, July 7, 2019

#30DayCardChallenge Day 7

Happy Sunday, Crafters!! It's Day 7 of my Card Challenge!
I'm using the stamp set Tropical Chic today. I don't think I've used this stamp set much, and I don't know why! I LOVE it!! I just might be using it again at some point of this challenge. I'm also using the colors Melon Mambo and Granny Apple Green. What a great combination!!
Here's the supplies I'm using for this card (Everything will be listed, along with measurements, at the end of this post) …

I'm starting off with a scrap of Whisper White Cardstock and Granny Apple Green Ink. I stamped 3 of the long skinny leaves and 2 of the short fat ones. When stamping, make sure to leave some room in between each leaf because we're going to be cutting them out with the Big Shot … 
Next, I used Melon Mambo Ink for the flowers. The first one I stamped regularly. But the second and third one, I stamped off once onto my paper surface then stamped onto the cardstock. This technique gives you a lighter color using the same ink …
Using Melon Mambo Ink, I stamped the sentiment …
Now it's time to bring them all over to the Big Shot. Unfortunately, Stampin' Up! no longer sells the Big Shot. But they are working on creating a brand new Die Cutter that I can't wait to see!! So I placed my stamped images on the cutting surface and lined up the dies. I always try to make multiple cuts at once to make things go quicker. I also took a piece of scrap Melon Mambo cardstock and cut it with the scalloped oval ...
I decided last minute to run the Granny Apple Green Cardstock through the Big Shot in the Swirls and Curls Embossing Folder to give it some texture. It turned out so pretty! I really like this embossing folder …
Now it's time to put it all together!!
When working with an embossed layer, it's always a great idea to apply adhesive to all edges. Attach it to Melon Mambo Cardstock, then to the Whisper White card base …
I started adding the leaves, one by one. Using the sentiment as a guide, I kept adding the leaves until I got the desired look …
I used dimensionals on the back of the sentiment and each of the flowers ...
Then attached them to the card front …
And that's card #7!! I hope you enjoyed this tutorial. If you have any questions, please don't hesitate to contact me. Here's a list of the supplies, along with the measurements ...

Thank you so much for stopping by!
xoxo
Dawn

Saturday, July 6, 2019

#30DayCardChallenge - Day 6

Hello Crafters!

My Stampin’ Up! team holds weekly challenges in our group. So for today’s card, I decided to participate in our Color Challenge. The challenge is to use the 3 colors Night of Navy, Balmy Blue, and Daffodil Delight. I'm sure you all know by now how much I love 'Quick & Easy' cards. This is definitely one of them!
Here’s the products I’m using for Day 6 …
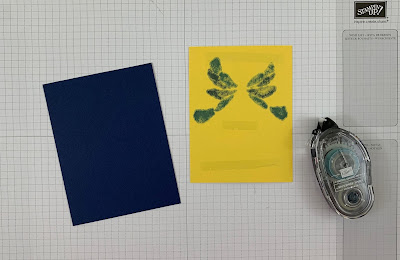
Starting with the Daffodil Delight Cardstock, and using Night of Navy Ink I stamped the butterfly on the center bottom. Then I stamped the sentiment top center …
Using the Stampin' Up! Blends markers, I colored the butterfly, but left a few areas uncolored. When using the Blends, you want to make sure to use a soft motion. You can go over it several times to get the darker color you desire. And because the ink absorbs into the cardstock, you want to slowly ease up to the outline so the ink doesn't spread outside of the butterfly ...
When the ink is dry, add some adhesive to the back and attach it to Night of Navy layering piece …
Take the Balmy Blue Cardstock and fold it in half to make the card base. Attach the front to the card base using adhesive …
And it's done! See? Quick and easy!! My favorite kind of cards …
I hope you enjoyed this tutorial! If you try this card yourself, I would love to see it. You can post it below, or you can post it over on my Facebook page. If you're not following me on Facebook, just click HERE

Thank you so much for stopping by! 

xoxo
Dawn

Here's a list of supplies that I used for this card. You can purchase any or all of them on my shopping website … DawnBowman.StampinUp.net


#30DayCardChallenge - Day 5

I know I’m a little late, but the holiday threw me off a little lol
For Day 5 of this challenge, I decided to use up some of my retired Designer Series Paper to make a bunch of cards. You can use absolutely any DSP for this card.
One of the many things I love about Stampin’ Up! is the ability to easily coordinate products. When you choose a color, or color combination, there are so many products available in that color! I remember the days before I joined Stampin’ Up! how I would stand in the isle of my local craft store trying to match Cardstock and DSP and ribbon. Ugggh what a headache it was! Now it’s SO easy 😍
Here are the products I’m using for today’s card (All supplies, including measurements, will be listed at the end) ...
The colors I'm using today are Calypso Coral and Old Olive. I'm also using
Whisper White cardstock and Silver Edged Ribbon.
I absolutely love this Silver Edged Ribbon!! You can use it as is (White), or you can color it any coordinating color you need! I'm using Old Olive Stampin' Blends Marker to color the ribbon today.
I cut a piece of ribbon long enough to wrap across the front of the
card, then used the Stampin' Blends marker to color it.
It was so easy and it didn't take
very long to dry.
Once the ribbon was dry, I used regular household clear tape
to secure to the back. Make sure you hold the ribbon
firmly, but not too tight that the paper buckles.
I colored another piece of ribbon and tied it in a bow.
then I trimmed the ends to make it the length I wanted.
I took the Calypso Coral card base and folded it in half,
then attached the card front to it.
I put a Glue Dot on the back of the bow, and
attached it to the card front.
You can stop there, and it would be a very pretty card. Or you can stamp a sentiment inside, or leave it blank to write a note. But I decided to add a sentiment to the front …
I really like the sentiments on the Stamp Set 'Love What You Do', so I 
decided to use it. I'm also using scraps of Old Olive and
Whisper White Cardstock, and stamping in Old Olive.
After stamping the sentiment on Whisper White, I attached it to the Old Olive
cardstock, then used Dimensionals to attach it to the card front.
Here's a couple of different sentiments I stamped
and attached to the front.
Well there you have Day #5! I'm sorry that it's a little late, and I'll be posting Day #6 later today.
I hope you enjoyed this tutorial. As always, if you have any questions please don't hesitate to contact me! Leave a comment below, send me a message or email me.
Thanks for stopping by!
xoxo
Dawn

SUPPLIES USED TODAY:
You can purchase ALL of these items (except for the retired DSP) on my shopping website by clicking right HERE

Don't forget about BONUS DAYS!!!
For every $50 (prior to tax & shipping) that you spend in July, you will receive a $5 coupon to be used in August!! I love this promotion!!!