Wednesday, January 4, 2023

Stampin' Up! Kits

Hello!!! And Happy New Year!!

One of my goals this year is to be more active and present in all areas of my life. I'm determined to devote more time to family, business, crafting, travelling ... all of my loves!

To start off the new year, I wanted to share with you something that you may not be familiar with that Stampin' Up! offers - Crafting Kits! 

You may be familiar with Paper Pumpkin - Stampin' Up!'s monthly subscription crafting kit. But did you know that Stampin' Up! sells individual kits that you can purchase any time? Plus you get to choose the kit you want without the surprise of the monthly subscription that's always a mystery until you open it!!

There are many kits to choose from and they come with all of the supplies that you'll need to create beautiful projects.

The most current kit that just became available is called Saying Thanks Kit. This one looks so pretty! And we always need thank you cards on hand lol. This kit includes everything you need to create 9 pretty cards - 3 each of 3 designs, plus 9 coordinating envelopes ...


Inside the kit, you'll receive printed die-cut words, precut pieces, white bakers twine, iridescent diamond sequins and enough adhesive to complete the entire project ...


If you're not looking for thank you cards, there are a lot of kits to choose from! Here are a few samples ...

Light The Candles includes everything you need to make 8 birthday cards including preprinted envelopes! In the kit ... precut pieces, stamp set, Coastal Cabana stampin' ink spot, adhesive and step by step instructions


The Best Remedy kit is a an adorable kit to make 9 card - 3 each of 3 designs. The kit includes a stamp set, Starry Sky stampin' ink spot, clear block, precut images and phrases, embellishments, adhesive and 9 coordinating envelopes ...


If you're looking for a different project, there are also non card projects like the Let's Party treat packaging kit! This kit features 2 sided pillow boxes sized perfectly for small treats, cash or a gift card. The kit includes everything you need to make 8 boxes - 4 each of 2 designs. You'll receive a stamp set, clear stamp block, Misty Moonlight stampin' ink spot, precut pieces, adhesive, enamel dots plus a storage box ...


There's also Love This Memory notebook kit! This kit is a perfect way to preserve amazing moments from your life in a fun and colorful way. This kit includes everything you need to make an 8.5"x5.25" notebook ... a stamp set, Parakeet Party stampin' ink spot, precut pieces, sticker sheet, printed cards to decorate with, washi tape, adhesive and a printed box for storage or crafting on the go!


There are SO many kits to choose from! I couldn't possibly share all of them or this post would be huuuge lol! If you're interested in kits, I recommend that you check out the Stampin' Up! website for our entire line. The kits are a perfect beginner project, that includes all the supplies you'll need without having to make extra purchases if you're just starting out.

To check out the kit line, and all of the other Stampin' Up! products, just click here to see all of my links in one place ...

ALL MY LINKS


As always, thank you so much for stopping by! If you ever have any questions please feel free to leave a comment below or contact me.


xoxo

Dawn


Wednesday, December 7, 2022

Window Christmas Lights

Putting up Christmas lights on windows ... ugghhh!!! It's soooo hard!

I had wooden window frames for years and I used thumbtacks. I just positioned them in between the wires and pressed them into the wood to hold them in place. 

When we had new windows installed, they had vinyl frames. When Christmas came around, I was like ahhhh!! How do we add lights??? I tried tape (all kinds!) ... I tried those suction cup hooks that you put on the glass ... I tried everything and they always fell down! 

Then I came across this idea a few years ago and decided to try it. And it works!!! They've been up for several years now, and it is soooo easy to put the lights up (& take them down!) every year.

Okay, so this is what you need ...

Double sided tape (I used Scotch brand)
Paneling End Cap Moulding
Scissors or razor knife to cut moulding
Plastic putty knife, or small spatula (Since I'm a crafter, I used my bone folder lol)

That's it!!!

Sooo, you start with measuring your windows to determine the length of moulding you need. I found the moulding in 8 foot pieces at my local home improvement store similar to this ...

**Make sure your windows are clean and dry**
Measure the height and width of window, and cut pieces to fit inside of window trim. Cut them 1-2 inches smaller because you don't want them to meet in the corners. Here is my first one that I should have cut a little smaller, but it still works.

After cuts are made, apply double sided tape to the back (flat side) of each piece. Position them in place on the windows and use a spatula to slide inside of the groove to press against the glass. I let mine set for an hour or 2 to make sure they adhered.

Once the pieces are in place, start adding your lights!
I used my fingers to line up the wire into the groove of the moulding, then used a bone folder to press the wire in snug. 
The first time I did this, it was a little difficult to press the wires in, I had to use a lot of pressure. But after that first year, it became easier and easier. I think maybe the moulding stretches?
Continue adding your lights until the window is complete.

I just love it! I think the best part is that when you press the wires into the groove, the lights stay uniform and straight! 
When the season is over I just gently pull the lights out and put them away, leaving the moulding in place. I do leave the moulding up all year! As I said, I've had these up for several years now. And yes - I wash my windows, put up other seasonal decorations, etc. and they stay in place ready and waiting for the next year!! And no - they don't interfere with opening and closing the windows! If they do become loose over time, I just add a little more double sided tape.


Easy peasy!! And sooo pretty!! This is probably the best decorating idea I've ever come across lol. If you give it a try, I'd love to hear how it turns out for you. Leave a comment or contact me anytime.


As always, if you have any questions, please feel free to contact me!

Until next time!!
xoxo
Dawn


Tuesday, November 8, 2022

Color Street Subscription Box!!

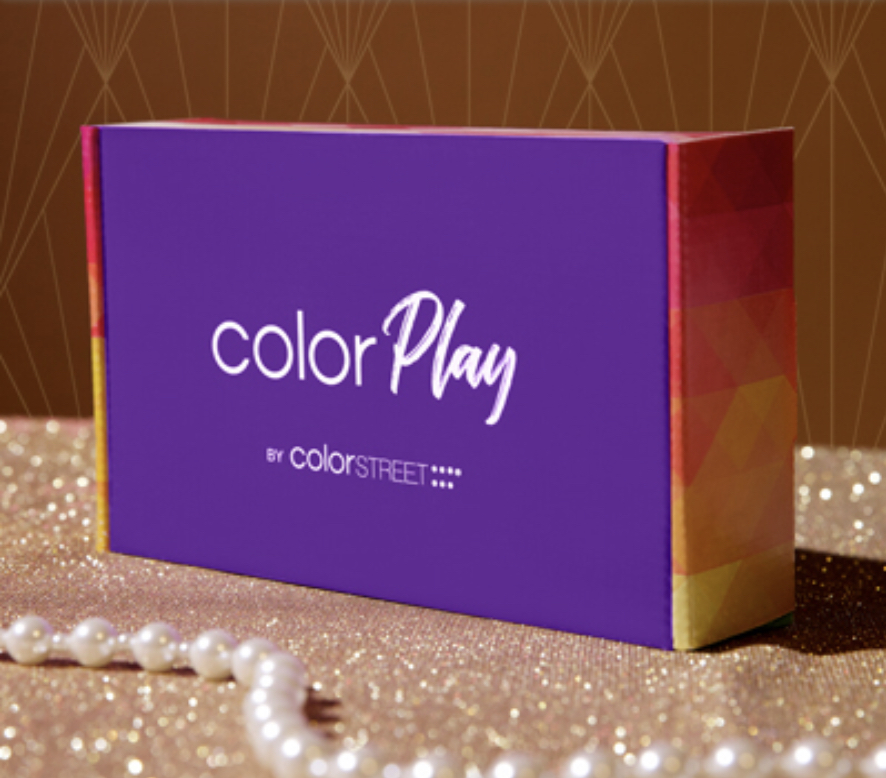
Introducing COLOR PLAY!!!!

Color Play is a monthly subscription box available through Color Street. Content will be a mystery each month, but a sneak of the monthly theme will be provided. Each box will contain exclusive full-size sets, exclusive accents, a guide showing 3 suggested mixed mani looks, and a special bonus item. (Scroll to bottom to see past subscription box contents)

The cost of each box is $30, which includes shipping! (Tax is based on your shipping address) To receive next months box, you must sign up before the 30th of this month. You can pause a month (or several), cancel or update your subscription at any time before the 24th of the month. 


FREQUENTLY ASKED QUESTIONS

Here are the answers to some frequently asked questions ...

Q. When will I be charged for the subscription box each month?

A. Subscription box charges will be processed on the 2nd of each month, before the box is shipped

Q. When will the monthly subscription box be shipped?

A. The subscription box will ship during the second week of each month

Q. What is the deadline to sign up to receive the following months box?

A. To receive the next months Color Play box, new subscribers must sign your on or before the last day of the current month. (For example, if you want December's box, you must sign up before November 30th)

Q. What is the return policy for subscription boxes?

A. Color Play boxes are nonrefundable. If you receive a box with missing or damaged items, please contact Customer Service as soon as possible. To skip an upcoming box or cancel your subscription for future boxes, adjust your preferences in the Color Play section of your account settings before the 25th of each month.

Q. Is there a limit to how many months can be skipped?

A. Subscribers can skip as many boxes as they want without penalty

Q. Will all monthly subscription boxes offer the same value in terms of included items?

A. While the exact value may vary slightly month to month, the total value of all items included in each box falls within a standard range that exceeds the final cost of the monthly subscription

Q. Can a customer cancel their subscription and re-enroll in the program under a different stylist?

A. Yes


Hopefully this answered any questions you may have about Color Play. However, if you have any additional questions, please feel free to contact me.

Are you ready to subscribe? Just click here ... SUBSCRIBE HERE 

Thank you for stopping by today! I am so excited to receive my next Color Play box to see what's in it!!

xoxo
Dawn

Past Color Play Box Contents:


Monday, November 7, 2022

18+ Gifts for $129!!!

Halloween is over and it’s the beginning of November… it’s time to start thinking about the holidays! I love Thanksgiving! I cook for about 10-15 people every year and absolutely love it. Buuuut I need to start thinking about Christmas first! And gift giving! Because that takes time and forethought!!

I usually start thinking about gift giving in October, and try to jot down ideas when they pop up. If I see something that I think someone on my list would like, I try to get it right then & there. There have been numerous times over the years that December pops up out of nowhere and I know I thought of the perfect gift for someone, but I don’t remember what it was! Uggghhh that’s the worst! So now I try to write it down, or just get it when I think of it.

I don’t know about you, but I create a list of people that I want to get gifts for and that list just keeps on growing and growing! I mean, I have the typical … my husband, (adult) kids, their spouses, my grandchildren. But then you have to add in sisters/brothers, cousins, friends, neighbors, bosses. Oh, and what about the other people in your life?! Teachers, nurses, your kids pediatrician, the vet, mail carrier, UPS driver … as I said, the list goes on and on!

If you have a lot of women on your list (think co-workers, sisters, teachers, etc) I found a way to create wonderful gifts for at least 18 people for just $129!! ... Become a Color Street stylist!

Hear me out (& do the math lol) … When you sign up to join Color Street, you pay $129 and they send you a starter kit. The kit contains 13 (random) full sets of dry nail polish strips, and for the month of November they’re throwing in 5 extra sets of holiday designs! Plus in your kit, you’ll receive nail files, testers (twosie accents), nail polish remover wipes, cuticle sticks, & alcohol prep pads that you can bundle up to create little mani packages! (Plus you’ll receive a bunch of business supplies)

But that’s not all! Also included in your kit is part of our hand and nail care collection! Plus part of our new lip care collection! You can divide it all up to create some amazing gifts, put them in pretty gift bags and you’re done! You’ve just checked at least 18 people off of your list for like $7 per person!!

The starter kit includes 13 sets of nail strips, 5 BONUS holiday sets, 72 testers, hand lotion, cuticle oil, 3 lipsticks, 2 lip liners, tinted lip balm, lip primer, 20 remover pads, 100 prep pads, 2 large nail files, 2 nail buffers, 60 mini nail files, 50 cuticle sticks, 25 catalogs, 25 brochures, Stylist Launch Guide, & a tote bag

Of course, you can throw some extras in also to make it a little more special. How about some fun holiday socks? Compact mirror? Hand sanitizer? Nail clippers? Ohh the possibilities are endless! I found a bunch of great products during Ulta Beauty's 5 for $5 sale, Dollar Tree, & Target’s dollar spot … so even adding in these extras, each gift cost about $10. Where else can you get such an amazing gift for $10?! 

You can use just contents from your kit, or step it up a bit by adding little inexpensive gifts. For the extra gifts, I added some holiday socks from Dollar Tree, Holiday lip balm and nail stickers from Ulta Beauty.

I stock up all year when there's good sales. Lip balms, nail clippers, lotion, nail brushes, hand sanitizers, nail tapes, stickers, holiday nail files ... anything cute & inexpensive to add to a gift.

Wait! There’s more! (that reminds me of infomercials 🤣) After you sign up to join Color Street, you’ll have immediate access to start reaping the wonderful benefits! You can order some sets for yourself - taking advantage of the buy 3 get 1 free deal and receive 25% commissions- even on your own orders! You’ll also have access to your personal shopping website that you can share with family and friends for them to shop from. Anything they purchase from your site, you’ll receive a commission!! It’s super easy to stay an ‘active stylist’ too! You only need any amount sale within 6 consecutive months (if you have zero sales within 6 consecutive months, you become deactivated). That includes your own personal purchases and those of your customers! 

I’ll be honest … I don’t have a ton of customers or a huge social media following. But I’ve been a Color Street stylist for over 2 years and have been able to stay active with no problem. Just by using the product I love and sharing that love with others, I’m able to continue on this wonderful journey.

I would love for you to join my team and be part of this amazing adventure! If you have any questions, please don’t hesitate to contact me. You can find all of my links (including the join opportunity) by clicking the link below.

Click HERE for links

Thanks for stopping by today!
xoxo
Dawn


Saturday, October 15, 2022

Wedding Card Box

As I mentioned in an earlier post, my son got married this past summer!!!! One of the projects that my new daughter in law requested for the wedding reception was a card box. She showed me a few pictures of what she was looking for, so naturally I volunteered to make one!

I was trying to find a set of 3 boxes, but was having great difficulty. Then I found this set of gray/silver nesting boxes on Amazon. Even though they're a set of 10, I thought they'd be perfect! So I chose the 3 sizes that I thought would work best, and I'll save the rest for another project lol

I had a set of small, medium and large boxes with lids. Now I can visualize what needs to be cut so when it's all put together, cards are dropped in the top opening and can fall all the way through to the bottom of the large box ... 

CUTS:
  • Small box ... opening in lid and bottom of box
  • Medium box ... opening in lid and bottom of box
  • Large Box ... opening in lid
I started with the small box lid and cut an opening for the cards to go in. I made sure to set it towards the front of the box so I can decorate behind it. The opening I decided on was 1 inch thick and 8 inches long. I used a razor knife and metal ruler to help with the cutting.
After that was cut, I placed the small box on top of the medium box lid and traced the bottom of it with a pencil. This gave me guidance on deciding where to cut the opening on the medium lid. I measured about an inch inside the traced box and used the razor knife and ruler to cut out the hole. Using the scrap cut out as a guide, I traced it on the bottoms of the small and medium boxes and the lid of the large box, then cut them all out. 
I thought about gluing them all together, but decided that it would be difficult and awkward to transport. So I came up with the idea of using binder clips inside each box to hold them together 
It really made it much easier to transport! I just stacked them all inside of each other, then clipped it together at the reception.
Once everything was cut and clipped, it was time to decorate!! I had several different ribbons on hand to choose from. I decided to use a rhinestone mesh ribbon around the card opening, and a white with silver metallic edge ribbon around each of the box lids. I thought it made it easier to apply with double sided tape than gluing all of the ribbon.

I used my Cricut to cut the word Cards out of black vinyl and attached it to the bottom front. For me, deciding on the flowers was the hardest part! Not only deciding on which flowers, but also their placement lol. I didn't want to make it too bulky so there was no damage when stacking them inside of each other. After playing around a bit, I used hot glue to finally attach them to the box. this is what I decided ...


And here's the card box on the Welcome Table at the reception (it received a lot of compliments and I was so happy with the result) ...

Thank you so much for stopping by today! I hope you enjoyed this project. If you have any questions, please feel free to leave a comment or contact me - I love hearing from you!

xoxo
Dawn

Thursday, October 13, 2022

Wedding Reception Invitations

After 10 years (& 3 children!) my son and his girlfriend decided to get married this past Summer!! But, they had a little twist! His dad & I, and her parents all live in northeast Illinois. My son and his girlfriend live in northwest Indiana. But they decided to get married in Nashville, Tennessee! Another twist was just the parents were invited to the wedding, but they planned on having the wedding reception 8 weeks later in Illinois.

So, we all drove down to Nashville and spent a wonderful weekend. The wedding ceremony was held at a beautiful little wedding venue and everything turned out perfectly. 


Once we got home, it was time to start planning the reception! Wedding reception prep starts with the invitation designing! Naturally because I’m a crafter and card maker, my son and his bride asked me if I could make the invitations. And y’all can imagine my answer lol! 

So, after some discussion about what they were looking for, my brain went to work on visualizing some designs. I knew I would be using my main go-to’s … Stampin’ Up! & Cricut products. They chose to use the colors light purple and gray, so of course I was going to use Stampin’ Up! cardstock (it's absolutely the best!). I picked out the colors Highland Heather and Smoky Slate and the bride & groom both approved.

Next was pulling up Cricut Design Space to start playing around with designs. I tried several designs that just didn't appeal to me. After discussing options with the bride, we decided on a tree shape, cut down the middle and folded over to the center. When you open up the tree, all of the reception details were on the inside. So I began designing, attaching, slicing, welding, sizing and resizing until I got it just right. Believe me, there were several failed attempts lol. It's a good thing I'm always stocked up on Stampin' Up! cardstock!

After creating the final design, I needed to figure out how to keep the invitation closed. I searched my stash and found several rolls of white ribbon that had a silver edge. However, it didn't look right using white on the gray and purple. Fortunately Stampin' Up! also carries coordinating Stampin' Blends markers!! I colored the white ribbon Highland Heather and it was the perfect touch to hold the invitation closed!


I created the inside design on the Canva app and printed it on the Highland Heather cardstock, then cut and attached them to the inside of the card base. Using the colored ribbon, I then tied them closed. I think they turned out pretty great and the bride and groom loved them! (& so did the guests!)

Thanks for stopping by today! If you ever have any questions, please don't hesitate to contact me or leave a comment ... I love hearing from you!

xoxo
Dawn

Wednesday, October 12, 2022

Halloween Witches

A few years ago, I made these witches for my front yard. Unfortunately I didn’t take pics of putting it together 😩 But I’ll do my best to explain …

I started off with 4 pieces of conduit (hollow metal pipes) for the body. Then I filled a plastic grocery bag with newspaper and shaped the head. Using duck tape, I attached the handles of the bag ‘head’ to the top of the pipe. I used a black flat sheet and centered it over the top of the head and used orange tulle to tie around the ‘neck’. For the face, I found some great witches masks and attached it with hot glue. I also used hot glue to attach a wig and the witches hat. I created all 4 witches the same way. They certainly aren't pretty lol ...


For the witches cauldron, I started with (3) 1x1x36 wood pieces to make the stand (you can use sturdy branches or whatever you have on hand). Holding them loosely together, I spread them out in a tripod form and wrapped twine around the top to secure.

I poked a hole in the top of each side of a plastic cauldron and used twine to attach to the tripod. I grabbed some sticks from my yard and stacked them under the cauldron, and used orange glitter tulle that I bunched up to create the fire.

Then I took 4 pieces of rebar (thick metal poles) around 4 feet long and pounded them into the ground to form a circle around the cauldron. I slipped each witch over the rebar and positioned them to face each other. Taking a corner from one of the witches sheets, I tied it to a corner of the next witches sheet to look like they were holding hands, attaching each witch to the next until all 4 were tied to each other.


This is what they look like in my yard this year ...

Here's a list of the items I used:

(4) plastic grocery bags
bunched up newspaper to fill each head (you can also use poly-fil stuffing, tissue paper, or plastic)
(4) 4-5 foot pieces of metal conduit
(4) 4 foot pieces of rebar
(3) 3 foot pieces of 1x1 wood pieces (or other choice of wood)
twine
plastic cauldron or pot
Orange glitter tulle, for tie and fire
twigs/sticks for fire
(4) black flat sheets, or other large material
(4) witches masks, wigs and hats of choice

I hope this made sense lol. I really wish I would have taken more pictures to help explain. If you have any questions, please don't hesitate to leave a comment or contact me.

Thank you so much for stopping by!

xoxo
Dawn